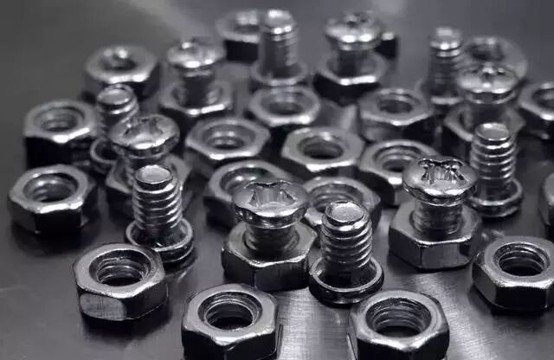
Key Findings
Correct washer placement, insertion direction, and tightening torque are the three pillars of a reliable bolted connection. Flat washers spread the load and belong on both the bolt head side and the nut side; spring washers provide anti-loosening protection and must always sit on the nut side, directly adjacent to the nut. Bolts must protrude 2–3 threads past the nut after tightening, and connection bolts should be tightened to a torque that meets the minimum values set in the governing standard. Follow the per-bolt washer counts and insertion-direction rules in this guide, and your distribution-line, electrical, and steel-structure connections will stay secure, corrosion-resistant, and compliant with specification.
Why Fastener Assembly Details Matter
In electrical distribution lines, transformers, and steel structures, a bolted connection is only as strong as its weakest component. A missing washer, a spring washer placed on the wrong side, or a bolt inserted against the grain can cause loosening under vibration, premature corrosion, galling, or outright connection failure. This guide consolidates the standard bolt, nut, and washer usage specifications for permanent bolted connections — covering basic requirements, location-based classifications, insertion direction, tightening torque, and assembly procedure — so you can install fasteners correctly the first time, every time.

1. Basic Requirements for Bolted Connections
When using ordinary bolts as permanent connections, five basic requirements apply:
| # | Requirement | Why It Matters |
|---|---|---|
| 1 | Flat washers under both the bolt head and the nut | Increases bearing area, prevents surface indentation and stress concentration |
| 2 | No more than 2 flat washers on the bolt head side; no more than 1 on the nut side | Limits stack height, preserves thread engagement and clamp load |
| 3 | Anti-loosening bolts / anchor bolts must use anti-loosening devices or spring washers (spring washer on the nut side) | Prevents self-loosening under vibration and cyclic load |
| 4 | Dynamic-load or critical-area connections: install spring washers per design, on the nut side | Adds elastic preload that resists loosening |
| 5 | Inclined surfaces (I-beams, channel steel): use inclined washers | Keeps nut/bolt-head supporting surfaces perpendicular to the bolt shaft |
Rule of thumb: Two flat washers are generally acceptable on the bolt head side, but only one on the nut side — and a spring washer, when required, always belongs next to the nut.
2. Classification of Bolt Installation Locations
Depending on position and function, bolts in power distribution lines fall into three categories, each with its own washer configuration.
2.1 Electrical Connection Bolts
Outdoor primary wiring should use hot-dip galvanized bolts. Every bolt must carry a flat washer and a spring washer, and after tightening the bolt should protrude 2–3 threads.
| Component per bolt | Qty | Placement |
|---|---|---|
| Flat washer | 2 | 1 on bolt head side; 1 on nut side |
| Spring washer | 1 | Nut side, adjacent to the nut |
| Nut | 1 | — |
2.2 Electrical Equipment Mounting Bolts
For connections between transformer bases, distribution boxes, and iron accessories, washer count depends on the surface geometry:
| Connection Type | Hardware per Bolt | Placement |
|---|---|---|
| Channel steel, inclined surface bolt | 1 nut + 1 inclined washer (inclined side) + 1 flat washer (flat side) | Inclined washer on the sloping face |
| Channel steel, flat surface bolt | 2 flat washers + 1 spring washer + 1 nut | 1 flat washer head side; 1 flat + spring washer nut side (spring adjacent to nut) |
| Disconnect switches / fuse cutouts / surge arresters to iron accessories | Use manufacturer-supplied mounting bolts | Per equipment instructions |
2.3 Iron Accessory Fixing Bolts
Washer selection here depends on the bolt-hole shape:
| Bolt Hole Shape | Hardware per Bolt | Placement |
|---|---|---|
| Round hole | 1 nut + 2 flat washers | 1 flat washer on each side (head and nut) |
| Elongated hole | 1 nut + 2 square washers | 1 square washer on each side |
| Double-ended bolt (each end) | 1 nut + 1 flat (or square) washer per end | On each end |
| Inclined surfaces (channel steel / I-beam flanges) | Inclined washers wherever possible | Keep nut/head support surfaces perpendicular to bolt shaft |
Tip: Square washers prevent the washer from rotating inside an elongated slot — never substitute round washers on elongated holes.
3. Bolt Insertion Direction Requirements
Insertion direction is specified to keep connections uniform, safe, and serviceable.
For three-dimensional structures:
- Horizontally: from inside to outside
- Vertically: from bottom to top
For planar structures:
- Along the line direction — double-sided components: inside to outside; single-sided components: from the power supply side or in a uniform direction
- Across the line direction — both sides: inside to outside; center (facing the receiving side): left to right or uniform
- Vertically: from bottom to top
For transformer platform planar structures:
- Reference the high-voltage and low-voltage terminals: insert bolts from the low-voltage terminal toward the high-voltage terminal
- Reference the transformer and pole: insert from the transformer side toward the pole side (inside to outside)
4. Bolt Tightening Torque Requirements
Connection bolts should be tightened individually, and the tightening torque must not be less than the values specified in the governing standard (referenced as “Table 4” in the source specification). The table below is a typical reference for common ISO Class 8.8 carbon-steel bolts — always confirm the exact values against the design standard for your project, since torque requirements vary by bolt grade, coating, and thread condition.
| Bolt Size (Metric) | Typical Tightening Torque (N·m, Class 8.8, reference) |
|---|---|
| M6 | ~9 – 11 |
| M8 | ~22 – 25 |
| M10 | ~44 – 50 |
| M12 | ~78 – 88 |
| M16 | ~195 – 210 |
| M20 | ~385 – 400 |
Critical warning: If you observe thread stripping on the bolt or nut, or if the nut edges are worn to the point that the wrench slips, the bolt and nut must be replaced immediately. Do not reuse damaged fasteners — they cannot deliver the specified clamp load and pose a safety risk.
5. Bolt Assembly Procedure
Follow these steps for a clean, specification-compliant assembly:
- Pre-inspection: Visually inspect bolts, nuts, and threaded holes for dents or scratches before assembly, ensuring they meet drawing/standard requirements.
- Protect threads: Avoid damaging the threaded portion during assembly.
- Correct seating: The washer under the bolt head and nut face must make uniform contact with the mating surface — no tilting, and never use a hammer to force surfaces together. The bolt shank must remain straight and free of deformation.
- Uniform compression: Connected parts should be uniformly compressed, tightly fitted, and securely fastened.
- Use the right tool: Never use an unsuitable wrench when tightening bolts and nuts.
- Hand-tighten first: Tighten bolts and screws by 2–3 thread pitches by hand before using a wrench or power tool to finish.
- Protect finish: Guard the paint film, plating, and heads of bolts and nuts during installation.
- Correct protrusion: After tightening, the bolt head should protrude 2–3 thread pitches above the nut face. Install nuts and washers with their reverse sides facing the connected component (the marked side of the nut is the front; the smooth side of the washer is the front).
- Paint mark: After bolting, apply a paint mark — typically a red dot — at the contact point between the bolt and nut. The color may vary by application environment, but it must be clearly distinguishable for inspection.
Conclusion
A dependable bolted connection is a function of three things done correctly: the right washers in the right places, the right insertion direction, and the right tightening torque. Place flat washers on both the head and nut side, keep spring washers on the nut side adjacent to the nut, use inclined washers on sloped surfaces, insert bolts in the prescribed direction, and tighten to the specified minimum torque with the correct tool. Follow these bolt, nut, and washer usage specifications and you will build connections that stay tight, resist loosening, and pass inspection — whether in power distribution lines, transformer platforms, or structural steel assemblies.
FAQ
Q1: Where should flat washers be placed on a bolted connection? Flat washers should be placed under both the bolt head and the nut to increase bearing area. Generally, use no more than two flat washers on the bolt head side and no more than one on the nut side.
Q2: Why must spring washers always go on the nut side? Spring washers provide anti-loosening preload. Placing them on the nut side — directly adjacent to the nut — ensures the elastic force is applied where loosening would otherwise occur, which is the standard requirement for anti-loosening and dynamic-load connections.
Q3: How many washers are allowed per bolt? As a general rule, up to two flat washers on the bolt head side and one on the nut side. When a spring washer is required, it sits on the nut side adjacent to the nut, in addition to the flat washers.
Q4: What is the correct bolt insertion direction? For three-dimensional structures: inside to outside horizontally, bottom to top vertically. For planar structures, follow the line-direction and transformer-platform rules described in Section 3 to keep fasteners uniform and serviceable.
Q5: How much should a bolt protrude after tightening? The bolt should protrude 2–3 threads (or 2–3 thread pitches) above the nut face. This confirms full thread engagement and allows proper visual inspection.
Q6: When are inclined washers required? Inclined washers are required when bolting inclined surfaces, such as channel steel or I-beam flanges, so that the nut and bolt-head supporting surfaces remain perpendicular to the bolt shaft, preventing bending stress and uneven loading.
Q7: Round holes vs. elongated holes — which washer do I use? For iron accessory fixing bolts: round holes use two flat washers; elongated holes use two square washers (to prevent rotation inside the slot). Double-ended bolts take one nut and one flat (or square) washer at each end.
Q8: What should I do if a bolt or nut is damaged during tightening? If you see thread stripping or nut-edge wear that causes the wrench to slip, replace both the bolt and nut immediately. Damaged fasteners cannot maintain the required tightening torque and should never be reused.
Q9: Why add a paint mark after assembly? A paint mark (typically a red dot) at the bolt–nut contact point provides a quick visual indicator that the connection has been properly tightened and allows inspectors to spot loosened fasteners at a glance.
Q10: Do torque requirements vary by application? Yes. The specification requires torque not less than the values in the governing standard (Table 4). Exact values depend on bolt grade, size, coating, and thread condition — always confirm against the design standard before tightening.
HKTL Fastener provides all kinds of professional fasteners with ISO, DIN & ASTM compliant manufacturing for global industrial clients.